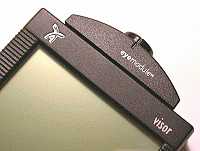
The only external parts to the eyemodule are the lens and the shutter button. There aren't any LEDs or other moving parts.
| Official
Gadgeteer Hands On Review: eyemodule Visor Springboard by Julie Strietelmeier Last date revised: 04/07/2000 |
Program Requirements:
Device:
Visor
48 K free RAM
The eyemodule from IDEO turns your Handspring Visor into a digital camera that is capable of taking black and white pictures as well as color pictures.
 |
The eyemodule is a Springboard module that slides into the
Visor's Springboard slot. When it is in the slot, it is flush with the
back of the Visor and only sticks out a little more than a 1/2 inch out of
the top of the Visor.
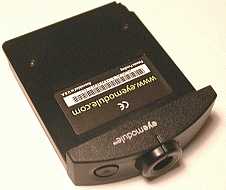
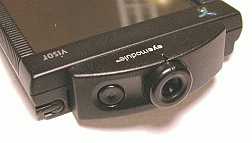
The only external parts to the eyemodule are the lens and the shutter button. There aren't any LEDs or other moving parts. |
The lens is fixed and can not be adjusted. The shutter button is a small dimpled button that is recessed so that it can't accidentally be activated. Pressing the button gives adequate feedback. Also, if you press the shutter button while the eyemodule is inserted into the Visor, it will power the Visor on and automatically start the eyemodule application.
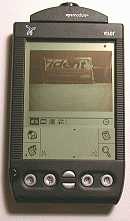
Pressing the shutter button will also take a picture (of course). You can also press the UP hardware button to take a picture. Either way, when you press the button once it will freeze the image on the screen and ask if you want to save the picture. If you press the shutter button or UP button again, the image will be saved to the Visor's memory. You can turn confirmations off so that you only have to press a button once to take a picture.
You have the ability to save images in 3 different formats:
160 x 120 B&W 9k
320 x 240 B&W 37k
320 x 240 Color 187k
The sizes reflect how much memory the images take up on the Visor. When you transfer them to your PC, they get converted into .JPG files that are larger in size.
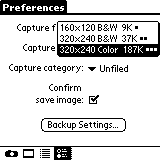
The eyemodule application on the Visor gets installed when you insert the eyemodule into the Springboard slot. It takes up 48k of your Visor's memory. Saved images are stored in your Visor's memory and not in the eyemodule itself. On a Visor Deluxe with 5meg of free memory, you can store more than 500 160 x 120 B&W images, 125 320 x 240 B&W images and more than 25 320 x 240 Color images.
The application is easy to use. It shows you a live camera view on the Visor's display. As you move the Visor around, the image on the screen moves around as well.
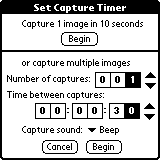
You can snap pictures by pressing the shutter button, or you can use the timer to automatically a snap picture after 10 seconds. You can also capture multiple images every so many seconds. Even if the Visor powers off due to inactivity, the eyemodule will turn on to snap the next image. This could be used for doing things like time lapse photography.
Images that you take can be viewed directly on the Visor. You can save the images to categories, rename the images, add notes to each image, and even beam images. If you want to beam an image to another Visor, that Visor needs to also have the eyemodule software installed on it in order to view the images.
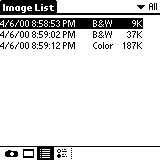
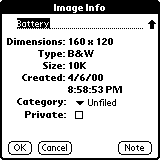
Once you have some images on the Visor, you can transfer them to your PC. A CD comes with the eyemodule that includes a conduit. When you hotsync your Visor, the images are converted to .JPG images and are saved to a folder on your PC. You can't transfer images back to the Visor though... The eyemodule also comes with a pretty nice image viewer / cataloger program called MediaCenter that you can use to organize, enhance and email the photos. I found that the MediaCenter software was nice, but it seemed sluggish on my 400mhz PC.
I found that actually using the eyemodule to take an image was awkward. It was hard to get the image framed correctly by using the Visor's display as a viewfinder. I'm used to using LCD viewfinders on regular digital cameras, but this seemed different. I think it was because you have to look down on the Visor's display to take a picture. The eyemodule lens needs to be pointing toward your subject which means the Visor is typically held flat with the lens pointing straight away from you. Unless you're taking a picture of the sky, you won't be holding the Visor in the typical upright position.
I also found that the mono Visor screen makes for a poor viewfinder. It seemed dark and hard to see. I think if the Visor had a color screen, this wouldn't be a problem.
The actual image quality was disappointing. I found that all the images were blurry, and grainy. Check out the sample images below (click on the thumbnails to see full-size pics). The images haven't been touched at all. They are exactly as they were transferred to the PC from the Visor.
(Battery pictures all taken from same distance ~ 5in)
As you can see, none of the images are very clear and sharp. In all fairness, the eyemodule that I reviewed was pre-production unit. Hopefully the production units will solve this problem.
In my opinion, the eyemodule is more of a toy or novelty item than a useful tool/camera. It is fun to play with but since the images are blurry and grainy, it can't be used for anything very serious. At almost $150, it is too expensive for a 'toy'. A couple things would make the eyemodule much better. A swivel lens so that you could hold the Visor in a more comfortable position while using the screen as the viewfinder. And sharper image quality.
If you have money to blow and just have to turn your Visor into a camera, then go for it. Otherwise, wait around for something better or go buy a real digital camera.
Price: $149 (Available May/2000?)
Pros:
Easy snap in Visor module.
Doesn't require batteries.
Nifty timed capture features.
Cons:
Blurry and grainy image quality.
Hard to use the Visor display as a viewfinder.
| Let me know your comments
on the eyemodule and read what others have to say. |